
Create New Drill
Overview
Use Create New Drill when you want to turn a training idea into a reusable practice building block.
A drill helps you capture a repeatable exercise in a structured way, so it can be used again in future sessions instead of being rebuilt from memory each time. This is useful for coaches who want a more methodical practice library and for athletes who want more structure in independent training.
CoachEye already includes a training library with ready-made content in Training Hub, so you do not need to create everything from scratch. In many cases, the existing library will cover common training needs. Create a new drill when you want to adapt training to a specific athlete, a specific goal, or your own coaching method.
Why this matters
A good drill makes training easier to repeat, easier to improve, and easier to understand later.
Instead of relying on memory or scattered notes, you can save a drill with a clear purpose, structure, and coaching cues. This helps keep training more consistent over time and makes it easier to connect drills to real development goals.
Creating your own drill is especially useful when:
- you want to repeat a proven exercise regularly,
- the built-in library is close but not specific enough,
- you need a drill for a particular player or training phase,
- or you want to preserve your own coaching patterns for future use.
Used well, drills help turn good training ideas into a repeatable system.
Use the library or create your own
Before creating a new drill, first check whether the existing training library already gives you what you need.
The ready-made library is the fastest way to get started and is useful for many common practice situations. It helps users work from proven material instead of rebuilding standard exercises every time. Browse and save content from Training Hub before you decide to author something new.
Create your own drill when:
- you need a more specific version of an exercise,
- you want to reflect your own coaching style,
- you are building a training library around a specific athlete,
- or you want a reusable block that does not yet exist in your library.
A strong workflow is usually a mix of both:
- use the built-in library for common training needs,
- create your own drills when the situation requires something more tailored.
When to create a new drill
Create a new drill when you want to design a clear training block for a specific purpose.
Typical cases include:
- a technical drill for one stroke or movement pattern,
- a rally pattern with a defined sequence of actions,
- a target-based drill for placement or decision-making,
- a physical or high-density block with a clear work/rest structure,
- a repeatable progression you want to use across several sessions,
- or a multi-part sequence that should run as one circuit.
As a rule, one drill should solve one clear training problem. If the exercise is trying to train everything at once, it usually becomes harder to teach, harder to repeat, and harder to review.
How to create a drill
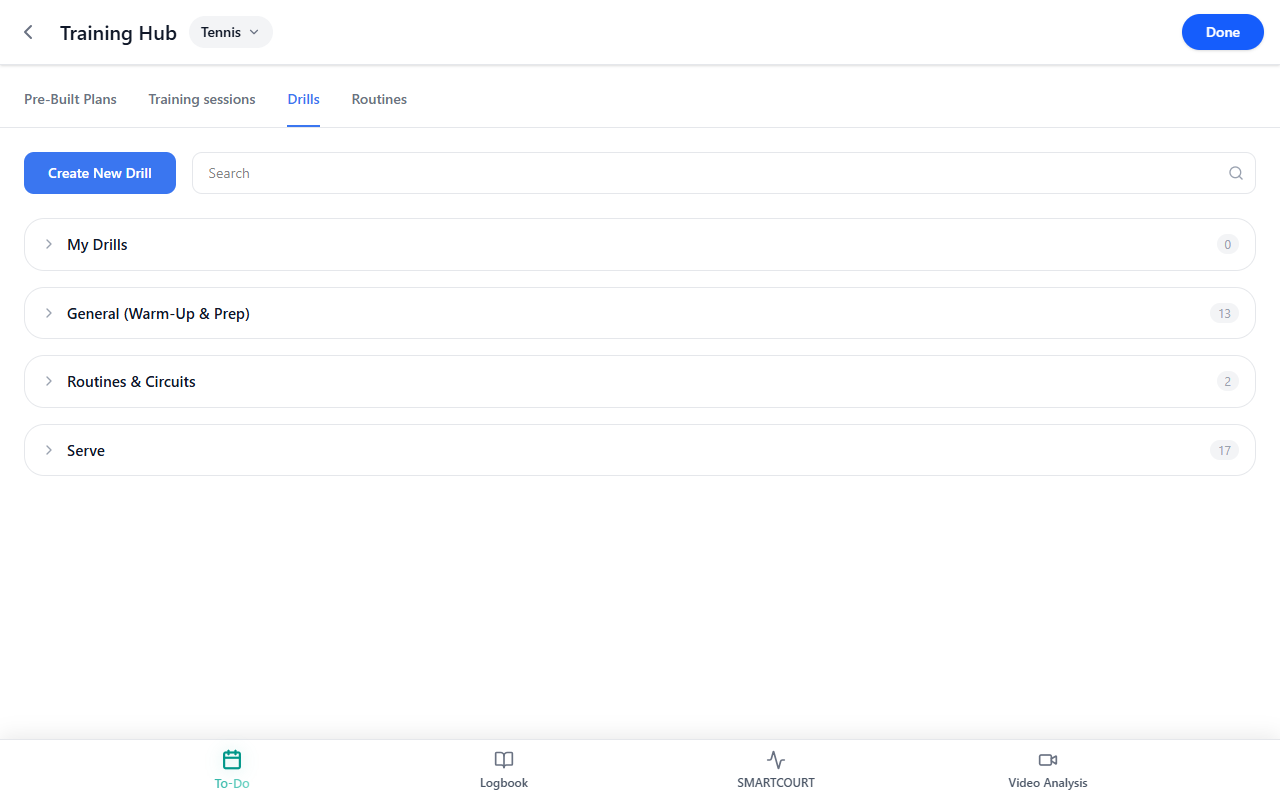
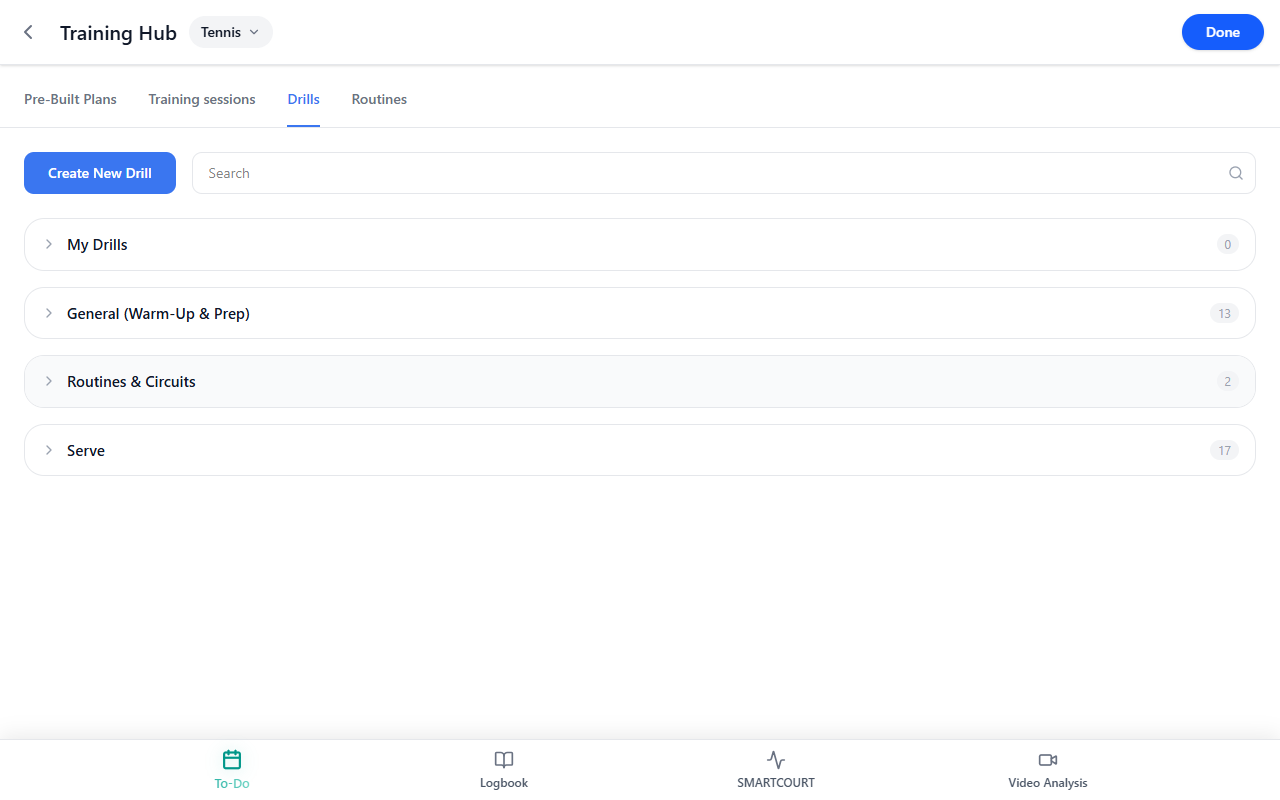
Open Create New Drill
- Open your profile menu at the top of the screen.
- Tap Training Hub.
- Open the Drills tab.
- Start Create New Drill.
At the top of the wizard you will see your current step (of six), Back, Next, and progress for Basics → Structure → Action Flow → Target Zones → Details → Review. Completed steps usually show a checkmark. Tap Next when the required fields on the step are filled.
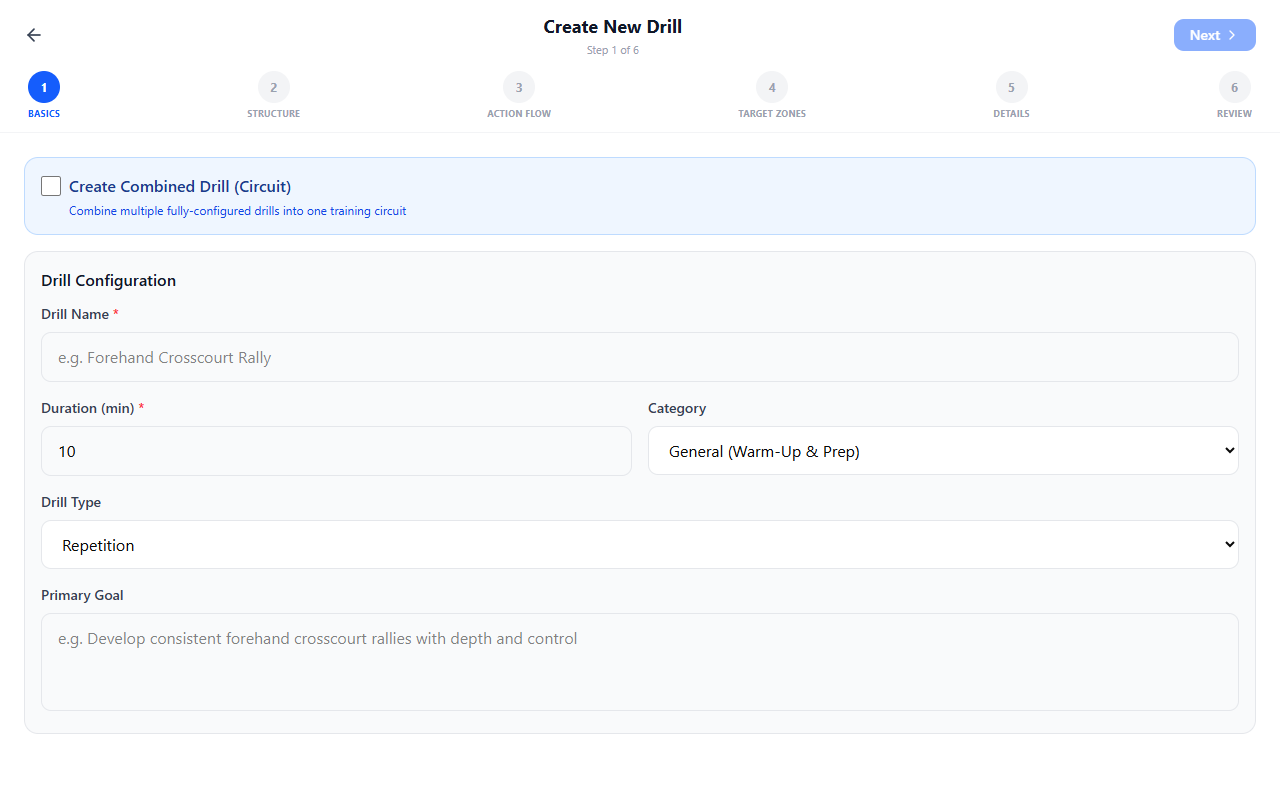
1. Basics
Start by giving the drill a clear identity and a realistic time budget. This helps with both scheduling and search later.
Fill in:
- Drill Name — a short, clear title based on the stroke, pattern, or training intent.
- Duration (min) — how long this block should run.
- Category — the library grouping, such as warm-up, tactical, physical, and similar options available in your app.
- Drill Type — how the exercise is run, for example repetition-based or game-based.
- Primary Goal — one sentence describing what this drill is meant to improve.
This step matters because a drill becomes much easier to find and reuse later when its name and category are clear. If you are unsure, choose the closest category and drill type first — you can refine your naming system as your library grows.
2. Structure
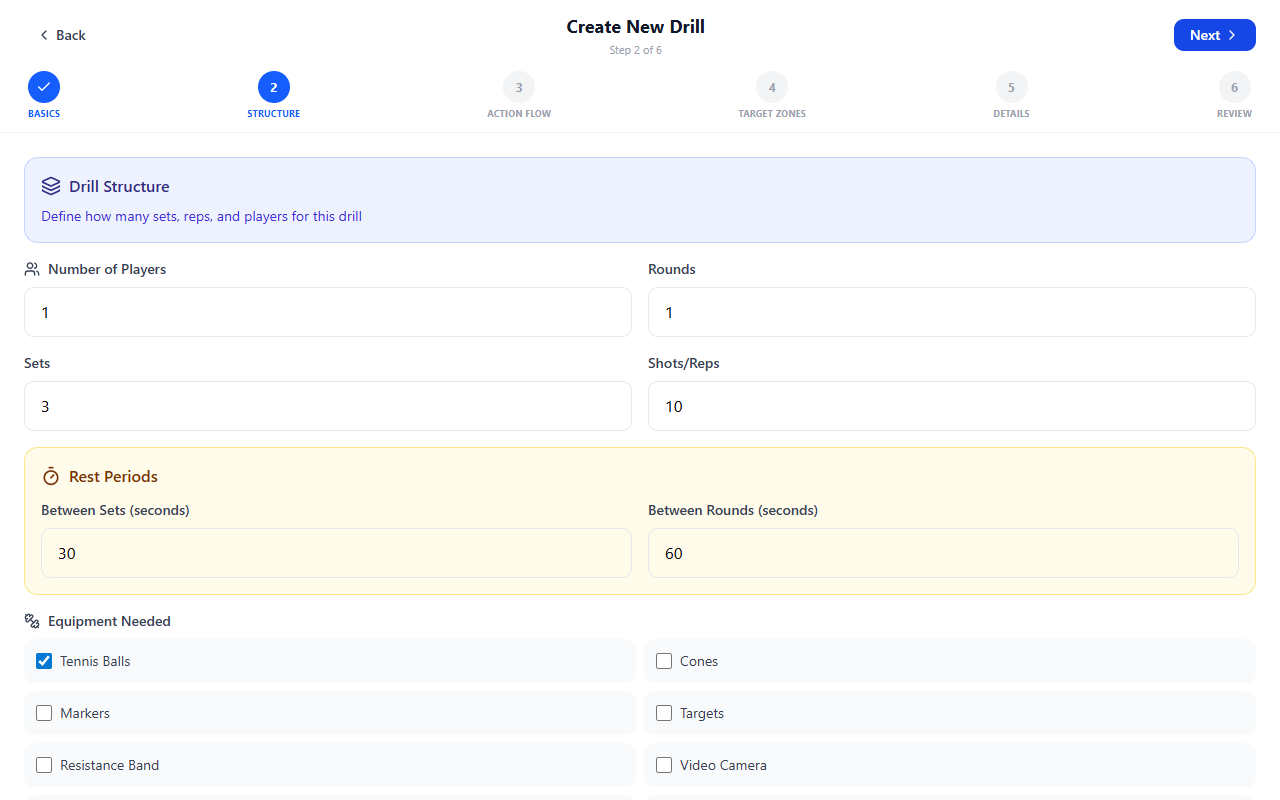
Use this step to define the workload and shape of the drill.
This is where training design becomes important. A good structure should match:
- the athlete’s level,
- the goal of the block,
- and the quality you expect from the repetitions.
When building structure, think about:
- how many repetitions or sets the athlete should complete,
- how dense the work should be,
- whether the block is technical, tactical, physical, or mixed,
- and how much recovery is needed to keep quality high.
If the rest intervals are too short, the drill may stop developing the quality you want and start rewarding survival instead of correct execution. In technique-focused drills especially, enough recovery helps preserve precision and repeatability.
3. Action Flow
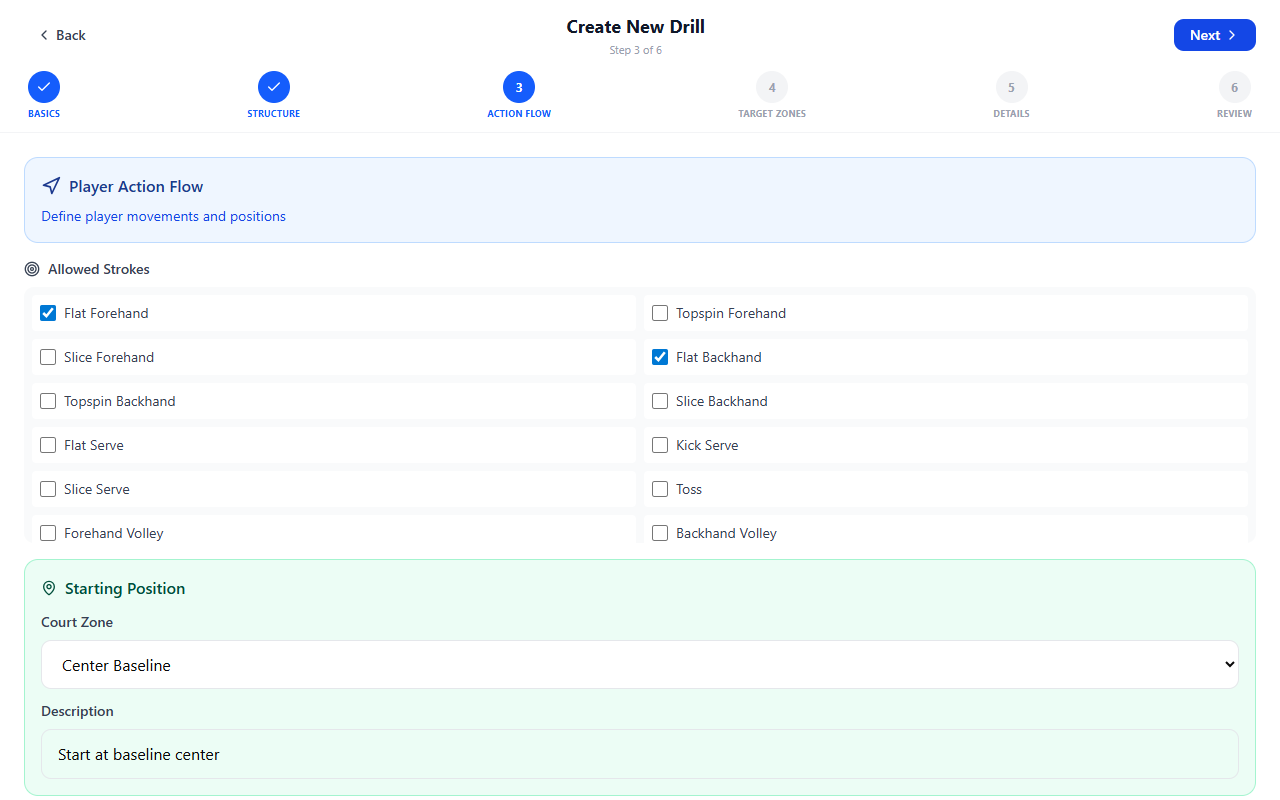
Define what actually happens inside the drill.
This is where you describe the sequence of actions, the pattern of play, or the repetition logic that makes the drill useful. The more clearly the action flow is defined, the easier it becomes to coach, repeat, and evaluate later.
Use this step to decide:
- what the athlete does first,
- what happens next,
- whether the drill is fixed or reactive,
- and whether the flow is narrow and technical or broader and more game-like.
If the drill is still new or technically demanding, it is often better to keep the action flow narrow and controlled. As the athlete becomes more stable, you can make the drill more open and complex.
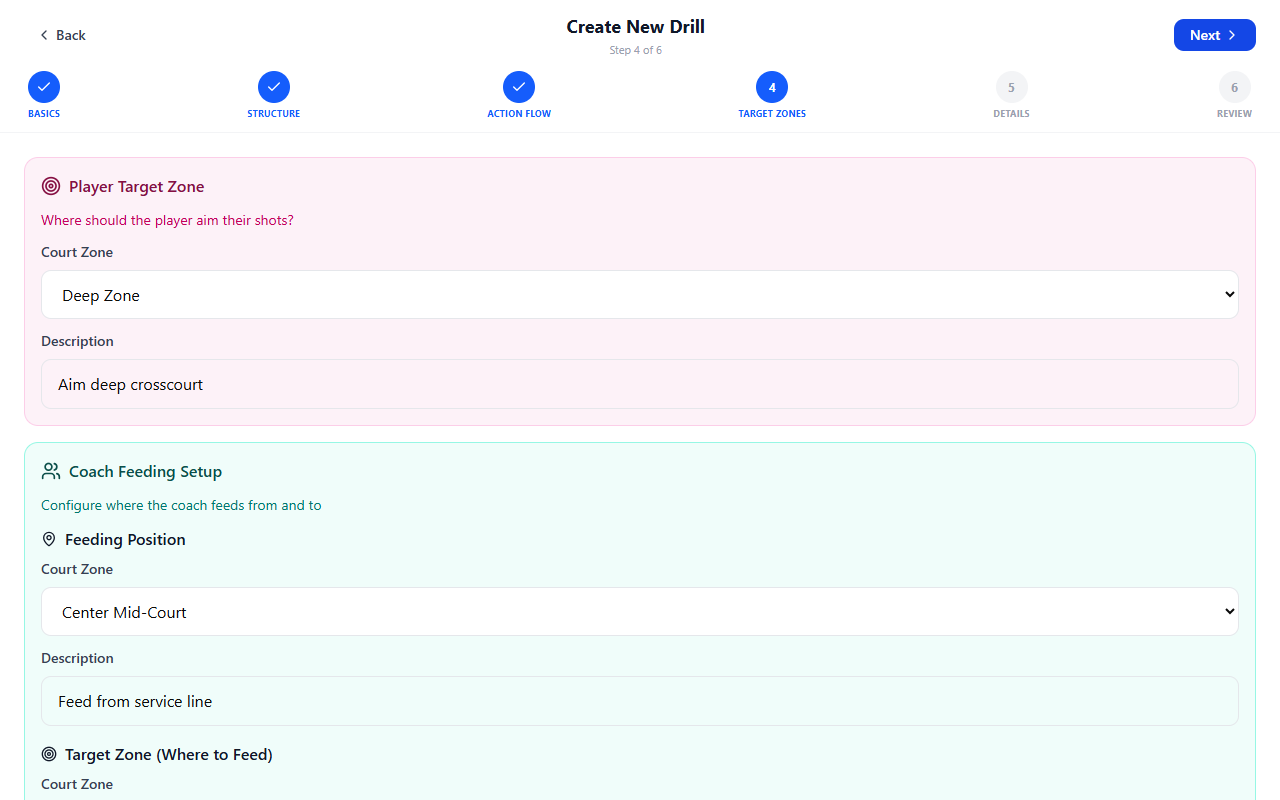
4. Target Zones
Use target zones when the drill depends on direction, placement, or tactical intention.
This is especially useful for:
- placement drills,
- serve-and-first-ball patterns,
- directional rally work,
- or exercises where spatial awareness matters.
Target zones help the athlete understand not just what to do, but where the quality of execution should be directed. They also make the drill easier to explain and easier to evaluate in practice.
5. Details
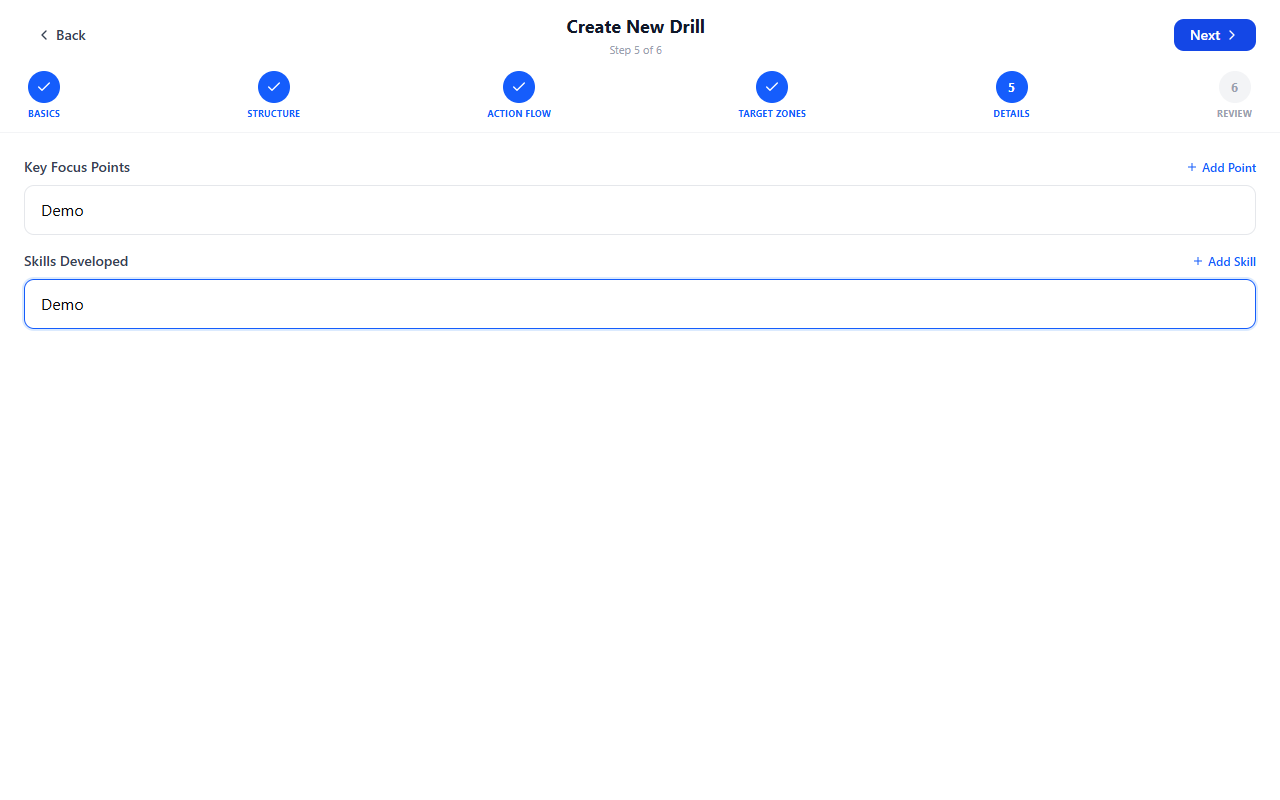
Use Details to add coaching guidance that makes the drill easier to run well.
Here you can add:
- Key Focus Points — short on-court cues.
- Skills Developed — longer-term abilities this drill supports.
Use Add Point or Add Skill when you need more lines.
This section is especially important because it connects the exercise to actual learning. The drill is not just a sequence of actions — it also needs clear cues and a developmental purpose.
Keep Key Focus Points short and actionable. These are the cues a coach or athlete can quickly use during the session.
Use Skills Developed to describe the broader abilities the drill is meant to build over time, such as consistency, transition timing, directional control, or decision-making.
6. Review
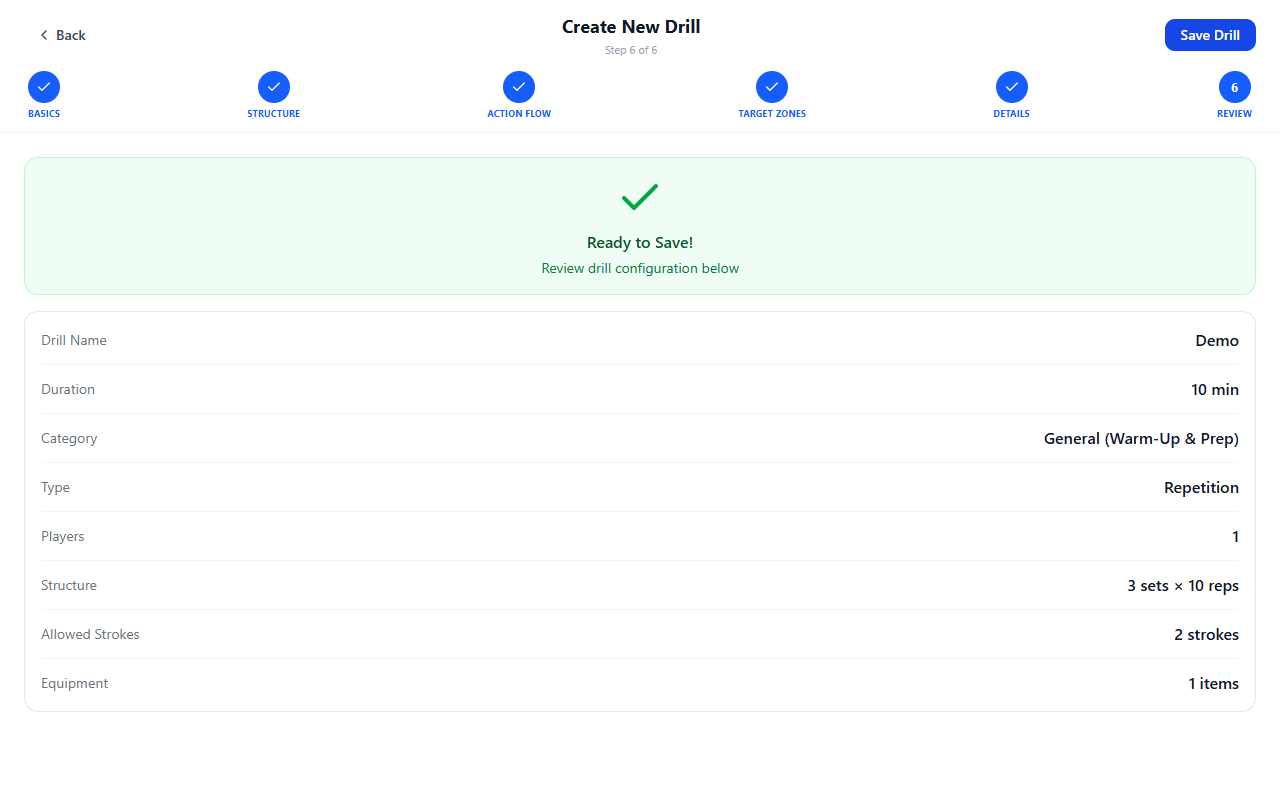
Before saving, review the drill as a complete training block.
Make sure:
- the name clearly reflects the purpose,
- the structure matches the intended level and intensity,
- the action flow is easy to understand,
- any target zones support the goal,
- the drill duration is realistic,
- and the coaching cues are useful in real practice.
This final check helps make sure the drill will still be clear and reusable later — not only today, but across future sessions.
Combined drill (circuit)
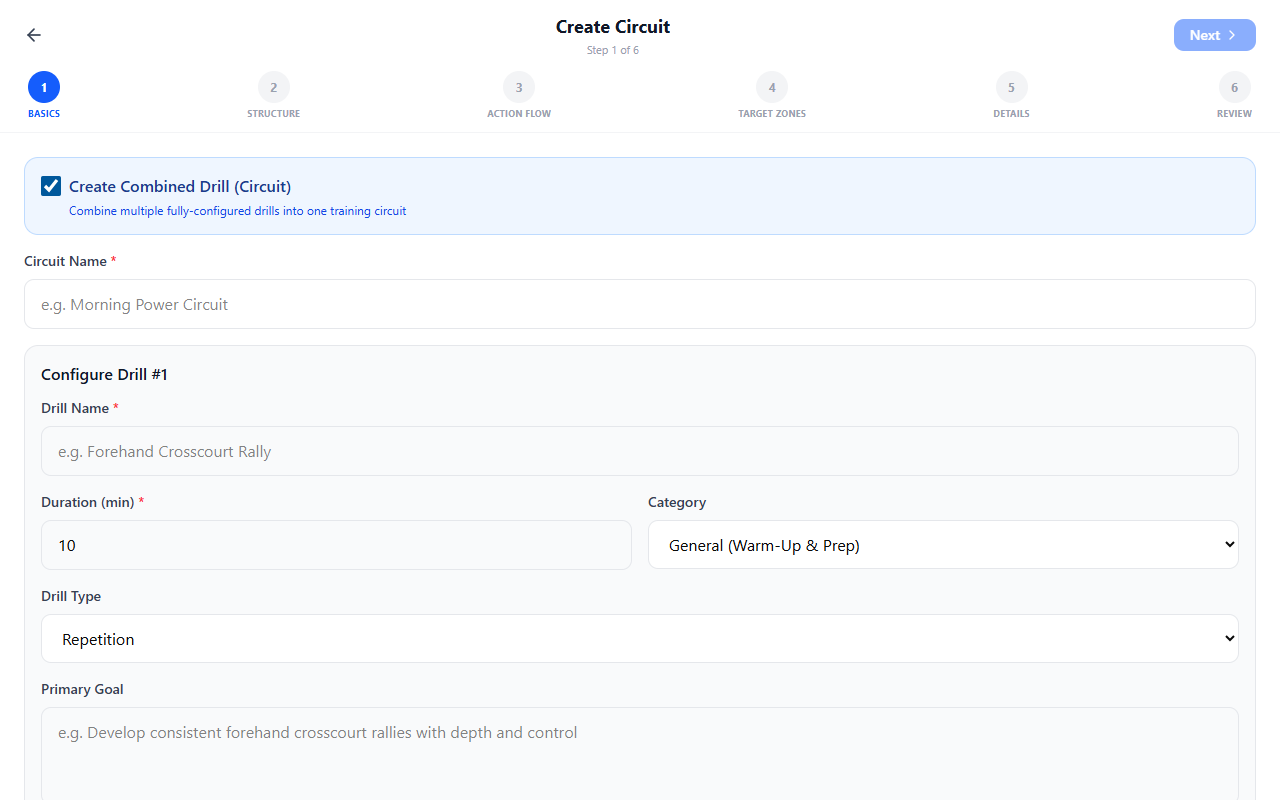
Enable Create Combined Drill (Circuit) when one training block should run several drills in sequence.
This is useful when a session should move through several connected exercises under one structure — for example:
- a warm-up progression,
- a multi-part technical block,
- or a short circuit built around several specific tasks.
When you create a circuit:
- give the circuit a clear name,
- set up the first drill,
- and add or reorder more drills if those options are available in your CoachEye build.
Use a combined drill when the sequence itself matters. If the exercises are not truly connected, it is usually better to keep them as separate drills.
Training design tips
When creating a drill, keep these principles in mind:
- Start with one clear goal. A drill should solve a specific problem, not several unrelated ones at once.
- Keep technical drills narrow. If the pattern is not yet stable, avoid making the drill too open too early.
- Match volume to quality. More repetitions are not always better. The structure should support the kind of performance you want.
- Use rest strategically. Recovery is part of training design, not wasted time. It protects quality and helps maintain focus.
- Name drills clearly. A short, specific title makes the library more useful later.
- Use circuits only when sequence matters. A combined drill should feel like one connected block, not a random collection of exercises.
What happens after you save
Once saved, the drill becomes part of your training library and can be reused later in planning and session flows.
This makes training easier to organize over time. Instead of rebuilding the same exercise again and again, you can return to a saved drill and use it when the same training need comes back.
Over time, your library becomes a more personal working system:
- built partly from ready-made content,
- and partly from your own drills designed around your athletes and training priorities.
Completed training built around these drills can later be reviewed in Logbook. You can also pull drills into Today, Add a session from Today, and Development Plans when you plan sessions.
Tips
- Start with Basics and make the drill easy to identify before adding complexity.
- If you are unsure about category or drill type, choose the closest fit first and refine later.
- Keep Key Focus Points short enough to use live on court.
- Use Skills Developed to explain the long-term value of the drill, not just the immediate instruction.
- Before saving, confirm that the structure, duration, and cues all match the athlete’s real training level.
- If the training block includes multiple connected parts, use Combined Drill (Circuit) instead of forcing everything into one simple drill.
Related guides
- Drills Collection — Training Hub · Drills tab; library layout and how to read drill cards
- Training Hub — browse the library and manage saved training content.
- Today — use drills in daily training workflows.
- Add a session from Today — add a session and attach routines or hub content.
- Development Plans — place drill-based work into the weekly schedule.
- Logbook — review completed training and session history.